


Face Detection with OpenCV: 2 Quick Tutorials
In This Article
What Is Face Detection?
Face detection is the process of automatically identifying or verifying a person from a digital image or video frame. It typically involves a computer using a machine learning algorithm to identify specific features in an image, such as the shape of a face or the patterns in an individual’s eyes.
Once the face is detected, it can be tracked and analyzed, allowing for applications such as facial recognition, which can be used for security or other purposes. Face detection is an active area of research in the field of computer vision, and many different approaches have been developed over the years.
What Is OpenCV?
OpenCV (Open Source Computer Vision) is a library of programming functions mainly aimed at real-time computer vision. It is free to use under the open-source BSD license and was developed by Intel.
OpenCV is written in C++ and supports a wide range of languages and platforms, including C++, Python, Java, and Android. It can be used on many different operating systems, including Windows, Linux, macOS, iOS, and Android. OpenCV also has a highly optimized implementation for ARM-based platforms, such as the Raspberry Pi, which makes it well suited for use in embedded systems.
OpenCV is used for a wide range of applications, including medical image analysis, stitching street view images, surveillance video, detecting and recognizing faces, tracking moving objects, and extracting 3D models.
OpenCV contains over 2500 optimized algorithms for these applications, including classical and state-of-the-art computer vision and machine learning algorithms. These algorithms can be used to perform various tasks such as image and video processing, object detection and tracking, and feature extraction.
To install OpenCV, run:
pip install opencv-pythonon your terminal.
Face Detection with OpenCV: 2 Quick Tutorials
DNN Face Detector
DNN Face Detector is a deep learning-based face detection model developed by OpenCV. It uses a convolutional neural network (CNN) trained on the WIDER FACE dataset, which contains images of faces with a wide range of scales, poses, and occlusions. The model is capable of detecting faces in images at different angles, even if they are partially occluded.
Here is an example of how you can use the DNN Face Detector model with OpenCV:
Note: Please ensure the files deploy.prototxt and res10_300x300_ssd_iter_140000.caffemodel exist in the same directory as the code snippet (click the links to download them from GitHub).
import cv2
Import numpy as np
#from google.colab.patches import cv2_imshow #To run in Google Colab, uncomment this line

# Load the DNN Face Detector model
face_detector = cv2.dnn.readNetFromCaffe("deploy.prototxt", "res10_300x300_ssd_iter_140000.caffemodel")

# Read the input image
print( “Read the input image”)
image = cv2.imread("input.jpg")

# Get the height and width of the input image
(h, w) = image.shape[:2]

# Preprocess the image by resizing it and converting it to a blob
print(“Preprocessing the image”)
blob = cv2.dnn.blobFromImage(cv2.resize(image, (300, 300)), 1.0, (300, 300), (104.0, 177.0, 123.0))

# Feed the blob as input to the DNN Face Detector model
face_detector.setInput(blob)
detections = face_detector.forward()

# Loop over the detections and draw a rectangle around each face
print(“Iterate over detections and create a rectangle”)
for i in range(0, detections.shape[2]):
    confidence = detections[0, 0, i, 2]

    # Filter out weak detections
    if confidence > 0.5:
        # Get the bounding box for the face
        box = detections[0, 0, i, 3:7] * np.array([w, h, w, h])
        (startX, startY, endX, endY) = box.astype("int")

        # Draw a rectangle around the face
        cv2.rectangle(image, (startX, startY), (endX, endY), (0, 0, 255), 2)

# Show the output image
print(“Show the final output”)
cv2.imshow("Output", image) #To run in Google Colab, comment out this line Colab notebook
#cv2_imshow(image) #To run in Google Colab, uncomment this line
cv2.waitKey(0)
print(“Completed”)
In this code, we first load the DNN Face Detector model using the cv2.dnn.readNetFromCaffe method. Then, we read the input image and get its height and width. Next, we preprocess the image by resizing it and converting it to a blob, which is a binary representation of the image that the DNN model can process.
We then feed the blob as input to the DNN model and use the face_detector.forward method to run the face detection algorithm on the image. This method returns a list of detections, where each detection is a tuple containing the bounding box coordinates of the detected face and the confidence score.
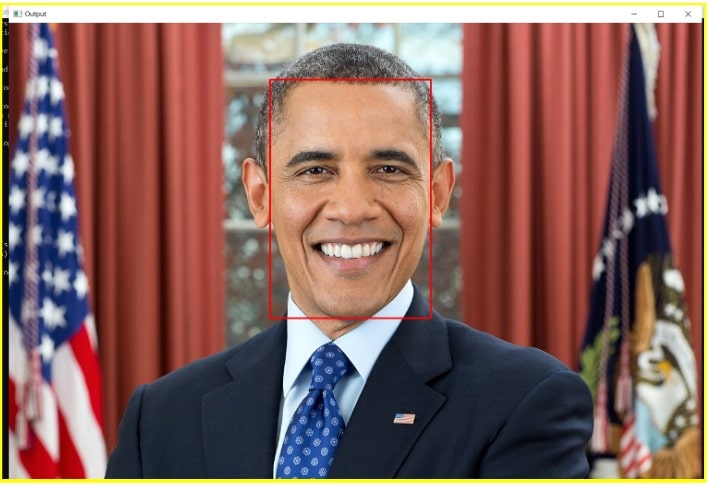
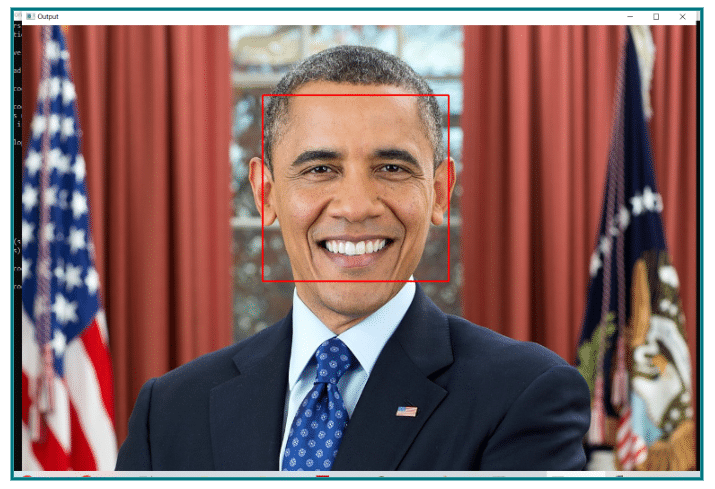
Finally, we loop over the detections and draw a rectangle around each face. In this example, we only draw the rectangle if the confidence score is greater than 0.5, but you can adjust this threshold as needed.
The output looks something like this:
Console output is shown below:
>python test.py
Read the input image
Preprocessing the image
Iterate over detections and create a rectangle
Completed
Haar-cascade
The Haar Cascade model is a type of object detection model developed by OpenCV. It is based on the Haar wavelet, a mathematical tool used to analyze signals and detect features in images. The Haar Cascade model uses a series of simple Haar-like features to describe the local appearance of an object in an image. These features are combined to create a classifier that can detect the presence of the object in an image.
Here is an example of how you can use the Haar Cascade model for face detection in an image using OpenCV:
Note: Please ensure you have the file haarcascade_frontalface_default.xml in the same directory as the following test code (click the link to download the file from GitHub).
import cv2
#from google.colab.patches import cv2_imshow #To run in Google Colab, uncomment this line

# Load the Haar Cascade model
print("Load the Haar Cascade Model")
face_detector = cv2.CascadeClassifier("haarcascade_frontalface_default.xml")

# Read the input image
print("Read in the image")
image = cv2.imread("input.jpg")

# Convert the image to grayscale
print("Normalize image by converting it to grayscale")
gray = cv2.cvtColor(image, cv2.COLOR_BGR2GRAY)

# Detect faces in the image
print("Detect faces")
faces = face_detector.detectMultiScale(gray, 1.3, 5)

# Loop over the detections and draw a rectangle around each face
for (x, y, w, h) in faces:
    cv2.rectangle(image, (x, y), (x+w, y+h), (0, 0, 255), 2)

# Show the output image
# Notework #To run in Google Colab, uncomment this line
cv2.imshow("Output", image)

# Notework #To run in Google Colab, uncomment this line
#cv2_imshow(image)
cv2.waitKey(0)
print("Completed")
In this code, we first load the Haar Cascade model using the cv2.CascadeClassifier class. Then, we read the input image and convert it to grayscale, as the Haar Cascade model expects a grayscale image as input.
Next, we use the face_detector.detectMultiScale method to detect faces in the image. This method returns a list of bounding boxes for each face detected in the image.
Finally, we loop over the detected faces and draw a rectangle around each one. Then, we show the output image with the detected faces highlighted.
The output looks something like this:
Console output is shown as below:
>python test1.py
Load the Haar Cascade Model
Read in the image
Normalize image by converting it to grayscale
Detect faces
CompletedRead More
The State of Facial Recognition Today
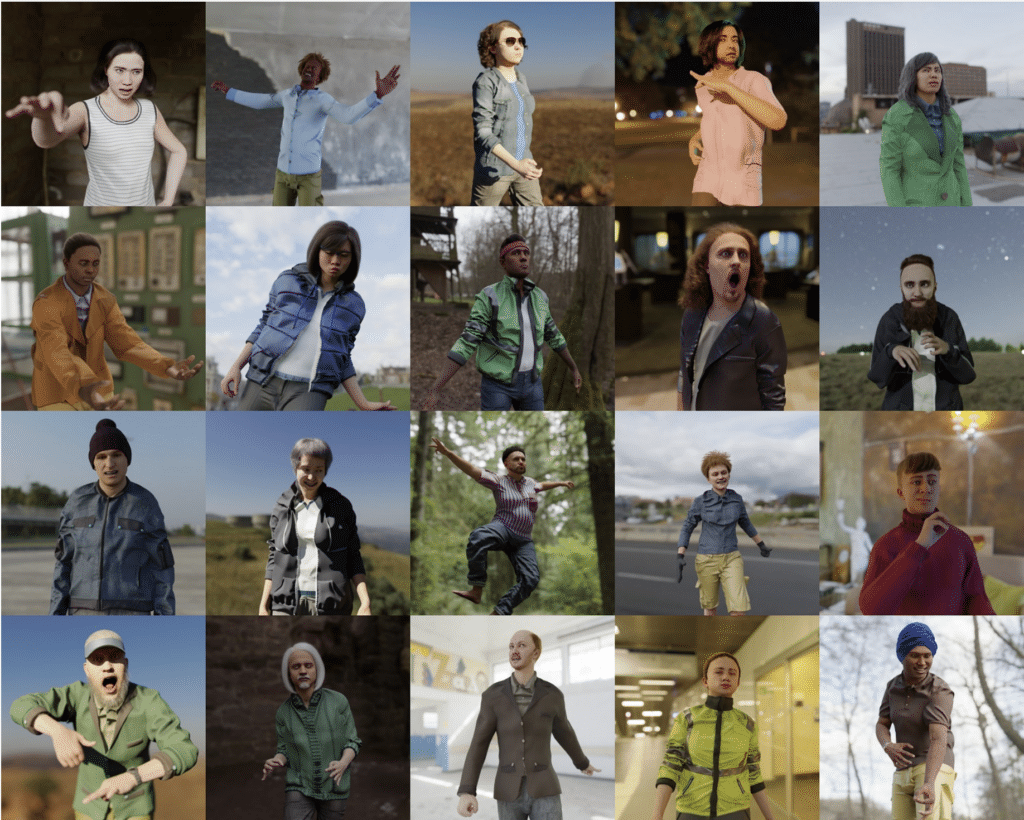
Procedural Humans for Computer Vision