


Labelme: the Basics (Plus a Quick Image Segmentation Tutorial)
What Is Labelme?
Labelme is an open source annotation tool based on http://labelme.csail.mit.edu. It was written in Python to support manual image polygonal annotation for object detection, classification, and segmentation.
Labelme lets you create various shapes, including polygons, circles, rectangles, lines, line strips, and points. You can save your labels as JSON files directly from the app. The Labelme repository offers a Python script to help you convert annotations to PASCAL VOL.
Other formats, such as YOLO and COCO, are not supported – but in our quick tutorial below we show an open source script that can let you convert Labelme output to COCO format.
This is part of our series of articles about image datasets.
In This Article
Installing Labelme
There are several options for installing the Labelme dataset.
- Install the dataset on any system using Anaconda or Docker
- Use the installer for supported operating systems, including Ubuntu, macOS, and Windows
Installing via Anaconda using Python 3
conda create –name=labelme python=3.6
source activate labelme
# conda install -c conda-forge pyside2
# conda install pyqt
pip install pyqt5 # pyqt5 can be installed via pip on python3
pip install labelme
Installing via Docker
wget https://raw.githubusercontent.com/wkentaro/labelme/master/labelme/cli/on_docker.py -O labelme_on_docker
chmod u+x labelme_on_docker
Installing on Ubuntu 14.04 or 16.04 using Python 3
sudo apt-get install python3-pyqt5 # PyQt5
sudo pip3 install labelme
For more installation instructions, see the Labelme Github repo.

Basic Operations with Labelme
There are several ways to annotate images with Labelme, including single image annotation, semantic segmentation, and instance segmentation.
Single Image Annotation
This use case involves applying labels to a specific image. Here are some examples of the operations associated with annotating a single image:
Annotation
Run the following command to annotate an image:
labelme apc2016_obj3.jpg -O apc2016_obj3.json
Visualization
You can use the following utility script to view JSON files quickly:
labelme_draw_json apc2016_obj3.json
Converting JSON to a dataset
Run the following command to convert the JSON to an image and label dataset:
labelme_json_to_dataset apc2016_obj3.json -o apc2016_obj3_json
This will generate the following standard files from your JSON file:
- Image file—img.png.
- uint8 label file—label.png.
- Label PNG visualization—label_viz.png.
- Label names for PNG file values—label_names.txt.
Loading a label PNG file
It may be challenging to load label.png using scipy.misc.imread, skimage.io.imread because it does not always work properly. You can avoid unexpected issues by using the command PIL.Image.open and the following script:
# see load_label_png.py also.
>>> import numpy as np
>>> import PIL.Image
>>> label_png = ‘apc2016_obj3_json/label.png’
>>> lbl = np.asarray(PIL.Image.open(label_png))
>>> print(lbl.dtype)
dtype(‘uint8’)
>>> np.unique(lbl)
array([0, 1, 2, 3], dtype=uint8)
>>> lbl.shape
(907, 1210)
Alternatively, you can use the following command to view a label PNG:
labelme_draw_label_png apc2016_obj3_json/label.png
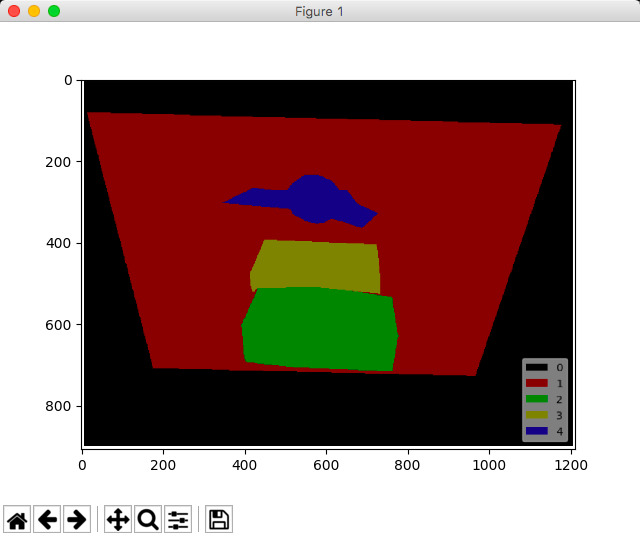
Image Source: Labelme
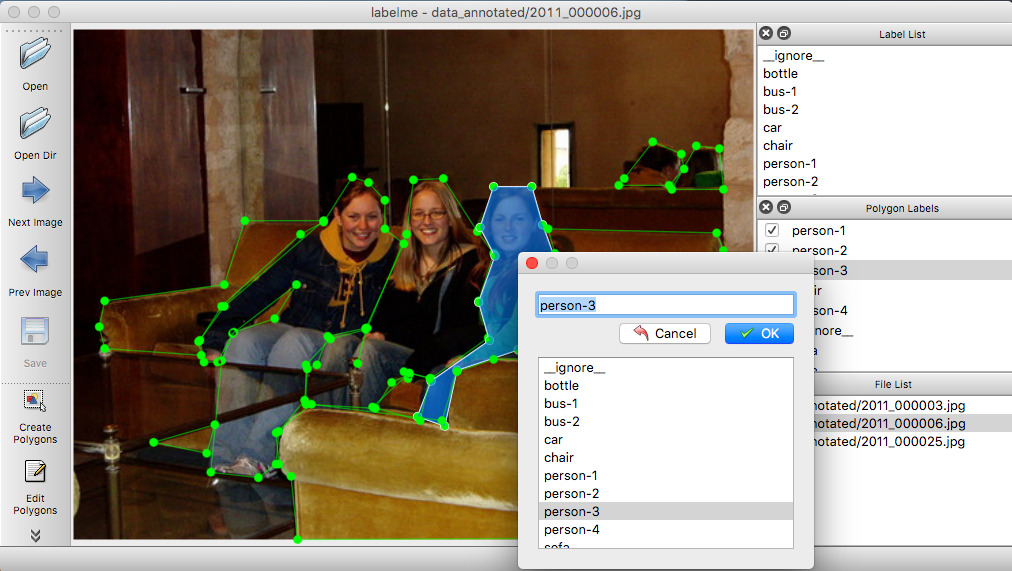
Semantic Segmentation
This use case involves segmenting images based on object classes, with every pixel assigned to a class to create fields with meaning. Operations include:
Annotation
Run the following code:
labelme data_annotated –labels labels.txt –nodata
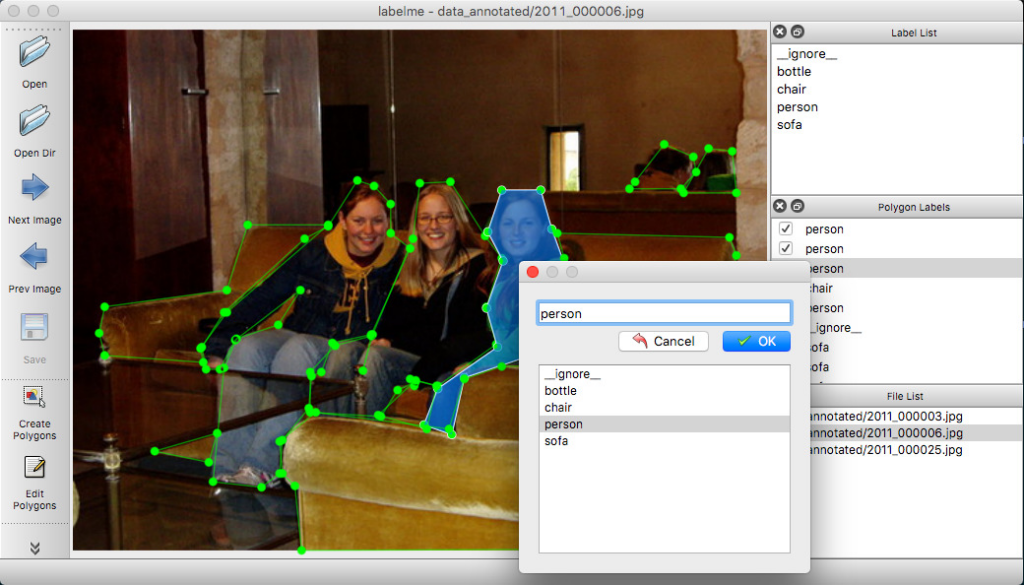
Image Source: Labelme
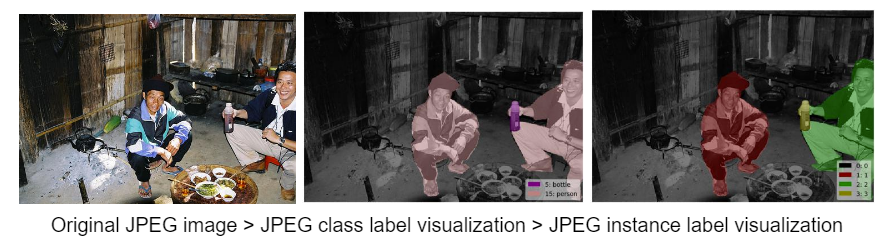
Converting to VOC dataset
Use the following script:
# It generates:
# —data_dataset_voc/JPEGImages
# —data_dataset_voc/SegmentationClass
# —data_dataset_voc/SegmentationClassVisualization
./labelme2voc.py data_annotated data_dataset_voc –labels labels.txt
The label file will only contain low label values (i.e., 0, 4, 14), with 255 indicating the _ignore_ value (-1 in the NPY file).
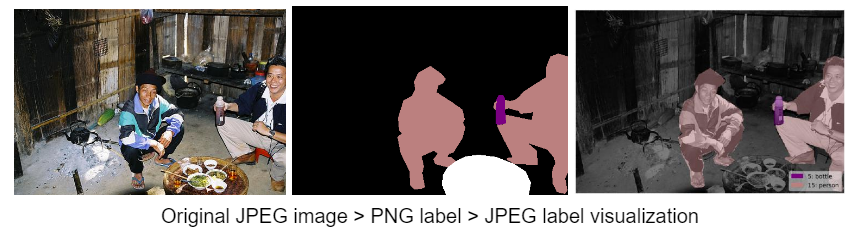
Use the following command to view the label PNG file:
labelme_draw_label_png data_dataset_voc/SegmentationClassPNG/2011_000003.png
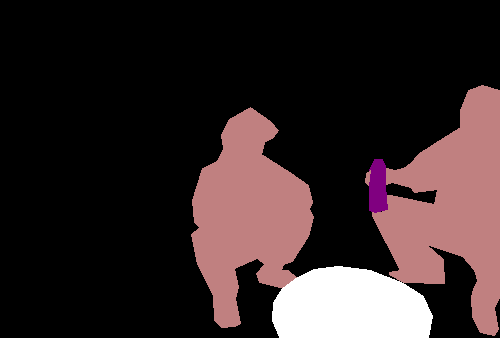
Image Source: Labelme
Generate Synthetic Data with Our New Free Trial. Start now!
Instance Segmentation
This use case involves identifying each instance of an object within an image. This technique focuses on delineating distinct objects, ignoring other pixels rather than assigning labels to each pixel as in semantic segmentation. Operations include:
Annotation
Run the following command to apply labels to objects:
labelme data_annotated –labels labels.txt –nodata
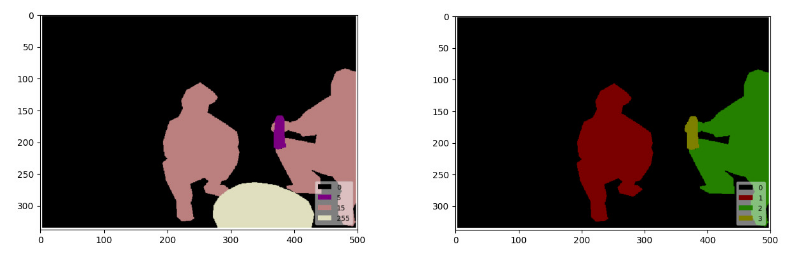
Converting to VOC dataset format
Use the following script to convert the data to VOC format:
# It generates:
# —data_dataset_voc/JPEGImages
# —data_dataset_voc/SegmentationClass
# —data_dataset_voc/SegmentationClassVisualization
# —data_dataset_voc/SegmentationObject
# —data_dataset_voc/SegmentationObjectVisualization
./labelme2voc.py data_annotated data_dataset_voc –labels labels.txt
The label file will only contain low label values, with 255 indicating the _ignore_ label value (-1 in the NPY file).
Use the following script to view the label PNG file:
labelme_draw_label_png data_dataset_voc/SegmentationClassPNG/2011_000003.png # left
labelme_draw_label_png data_dataset_voc/SegmentationObjectPNG/2011_000003.png # right
Converting to COCO dataset
Use the following script to convert the labels to COCO format:
# It generates:
# —data_dataset_coco/JPEGImages
# —data_dataset_coco/annotations.json
./labelme2coco.py data_annotated data_dataset_coco –labels labels.txt
Quick Tutorial: Creating a Custom COCO Dataset for Instance Segmentation with Labelme
In this tutorial we’ll show how to label images with Labelme and use them to create a custom COCO dataset, then use it to train an image segmentation model with MMDetection. This is abbreviated from the full tutorial by Chengwei Zhang (see the GitHub repo).
Related content: Read our guide to the MS COCO dataset
Step 1: Creating a Custom COCO Dataset
Use the following steps to create your custom COCO dataset:
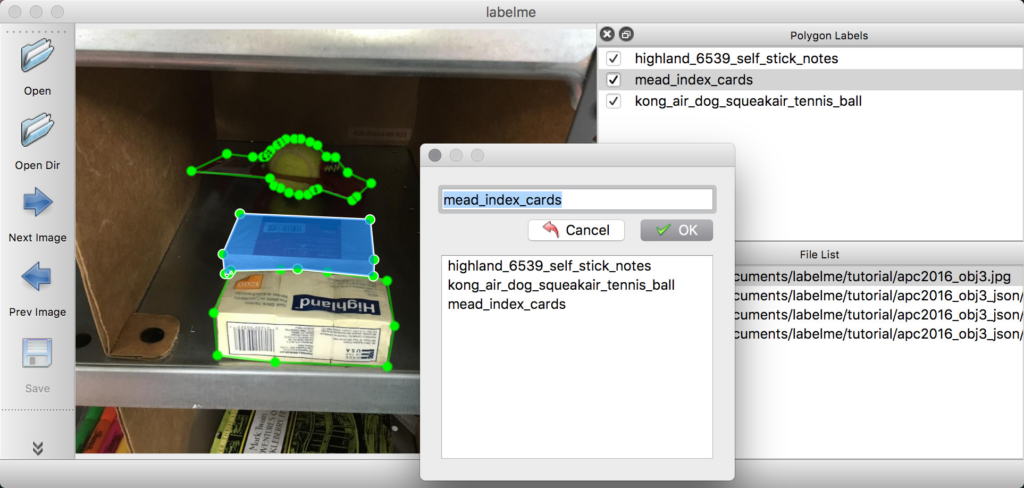
- Open Labelme and click on Open Dir to navigate to the image folder that stores all your image files.
- Select the images and draw the polygons. To close a polygon (when you’ve finished applying the points), press Enter, and the tool will automatically connect the first and last points.
- Once you’ve finished annotating the image, press D on your keyboard to go to the next image. It should take about 15 minutes to annotate ten images with multiple objects.
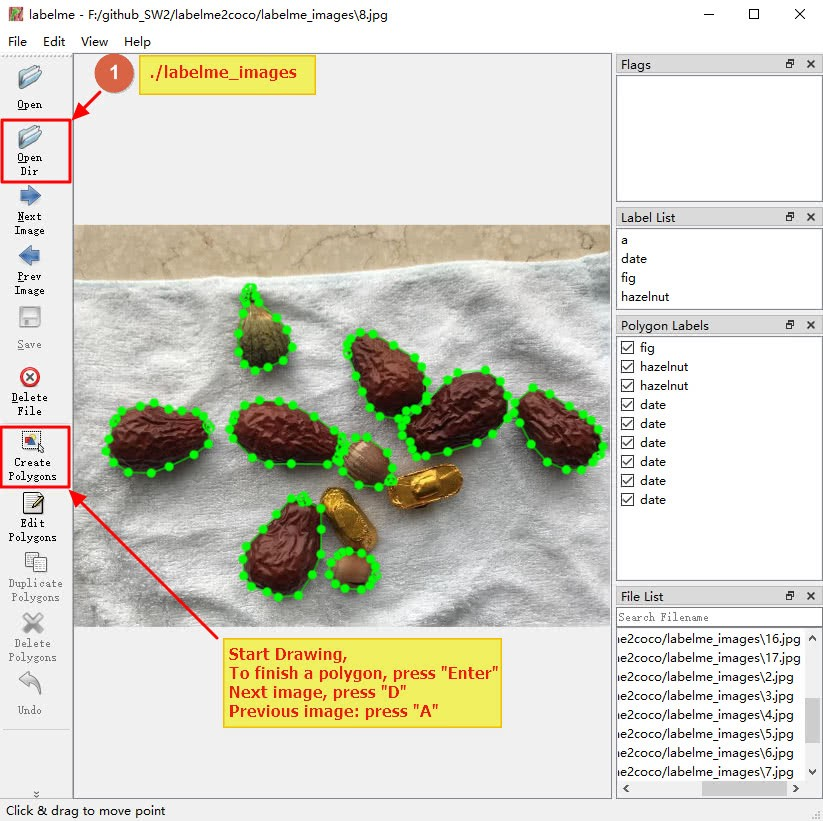
Image Source: Chengwei Zhang
- When you’ve finished annotating all the images in the folder, go to the image directory to retrieve a JSON file list with the same names as the images in the folder. These files are LabelImg annotation files, which you can convert and combine into a single COCO dataset (a JSON annotation file).
Step 2: Converting Labelme Annotation Files to COCO Format
You can find the labelme2coco.py file in the tutorial GitHub repo. You can implement the file conversion by passing in a single argument (the image directory path):
python labelme2coco.py images
Three pip packages—numpy, pillow, and labelme—will determine the script. If you are missing one of these files, make sure you install it with pip. Once you’ve executed the script, you should find a trainval.json file in your current directory—this is the COCO dataset JSON annotation file.
You can then open the COCO_Image_Viewer.ipynb jupyter notebook to verify the annotation.
Step 3: Training Instance Segmentation Model with MMDetection Framework
MMDetection is a PyTorch-based, open source toolbox for detecting objects in images. There are various instance segmentation options available—you can use mask or cascade mask RCNN to perform transfer learning using pre-trained networks. The easiest way to do this is to run the Google Colab notebook online using free GPU resources and download the final trained model.
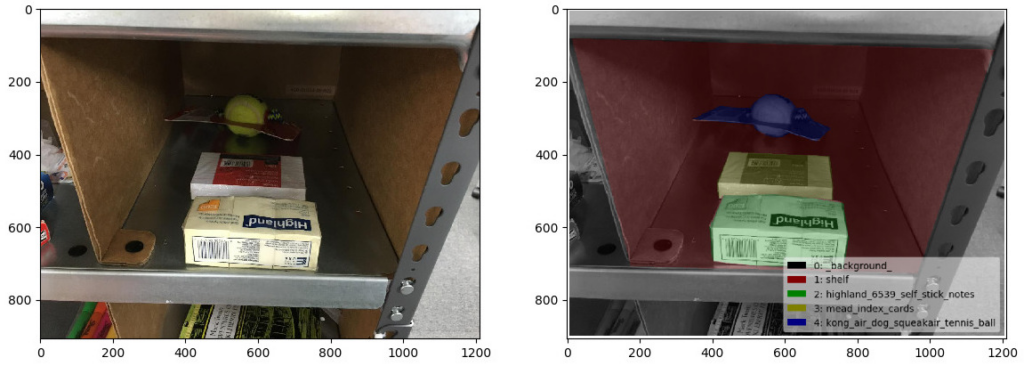
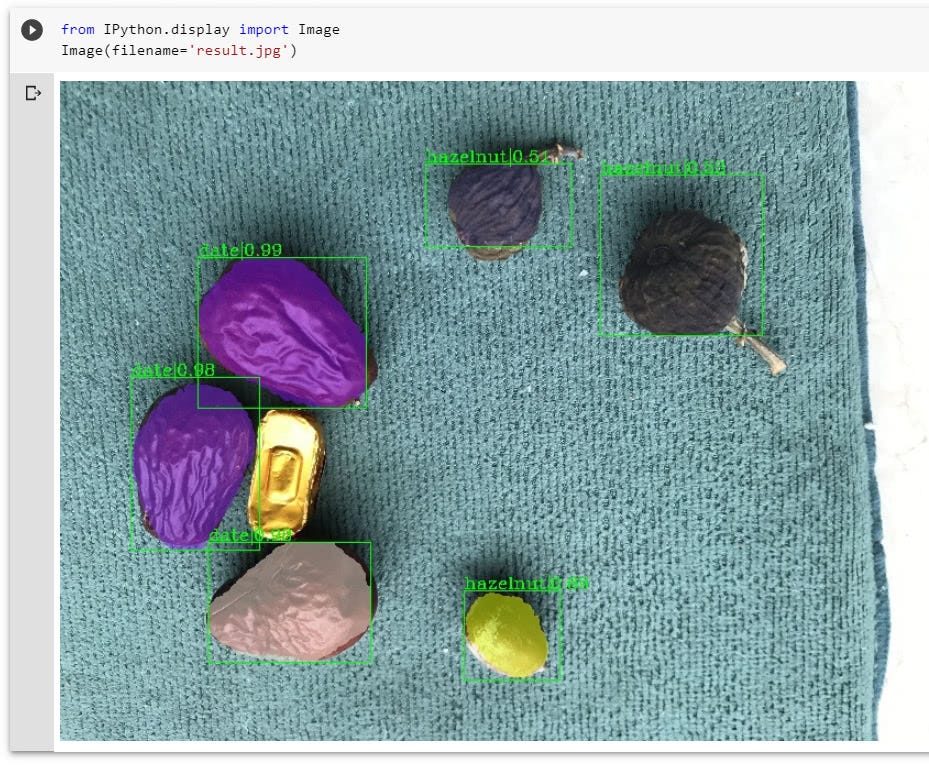
Training a mask RCNN model for 20 epochs should take 10 minutes or less, and the prediction result when you finish should look like this:
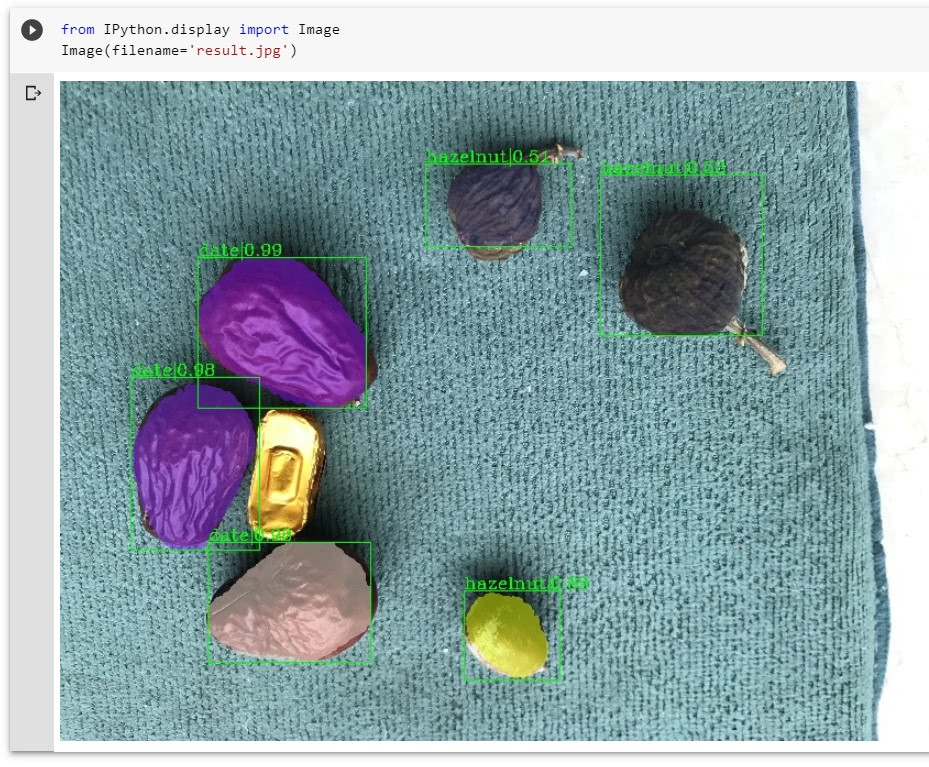
Image Source: Chengwei Zhang
Generate Synthetic Data with Our New Free Trial. Start now!
Get our free eBook
How to use synthetic data in 6 easy steps

Read More
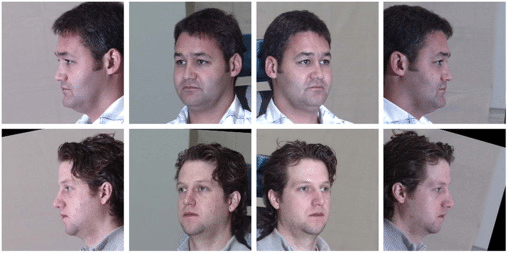
The State of Facial Recognition Today
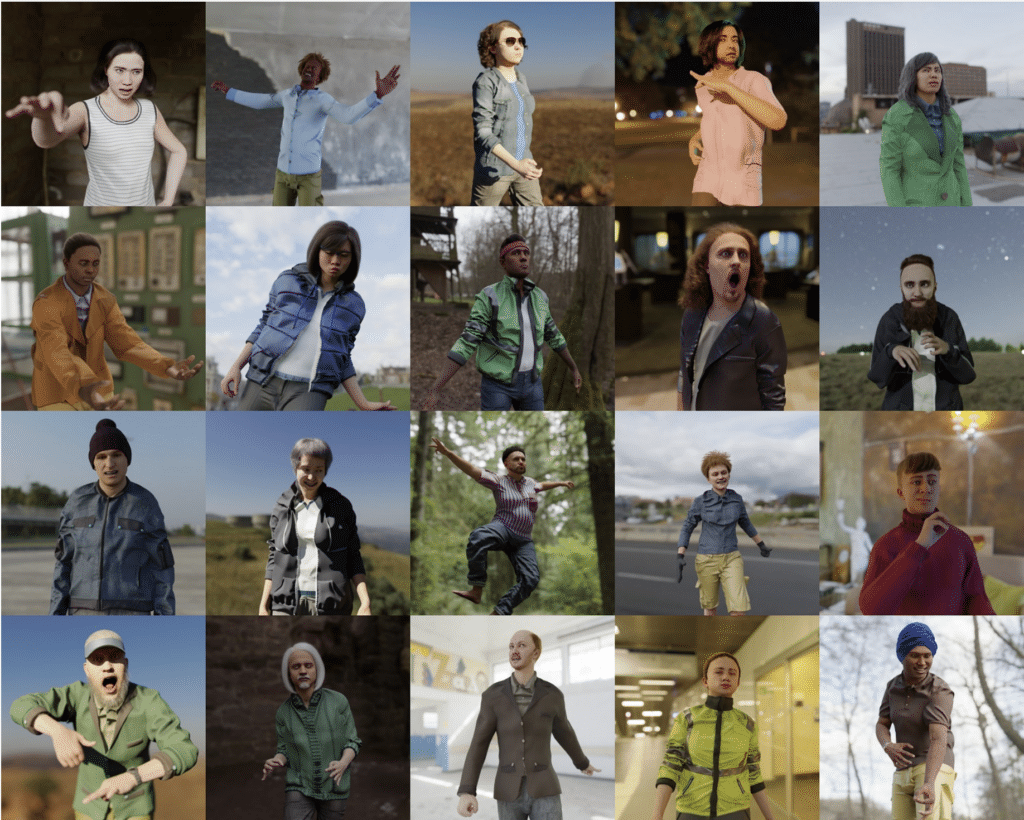
Procedural Humans for Computer Vision