


6 Ideas for Computer Vision Projects You Can Start Today
In This Article
What Is Computer Vision?
Computer vision is a field of computer science that focuses on enabling computers to interpret and understand visual data from the world around them. This includes understanding the content of images and videos, as well as extracting information about the objects and scenes depicted in them.
Computer vision has many potential applications, including in robotics, autonomous vehicles, security and surveillance systems, and medical imaging. Some examples of tasks that can be performed using computer vision techniques include:
- Identifying and labeling objects in an image or video
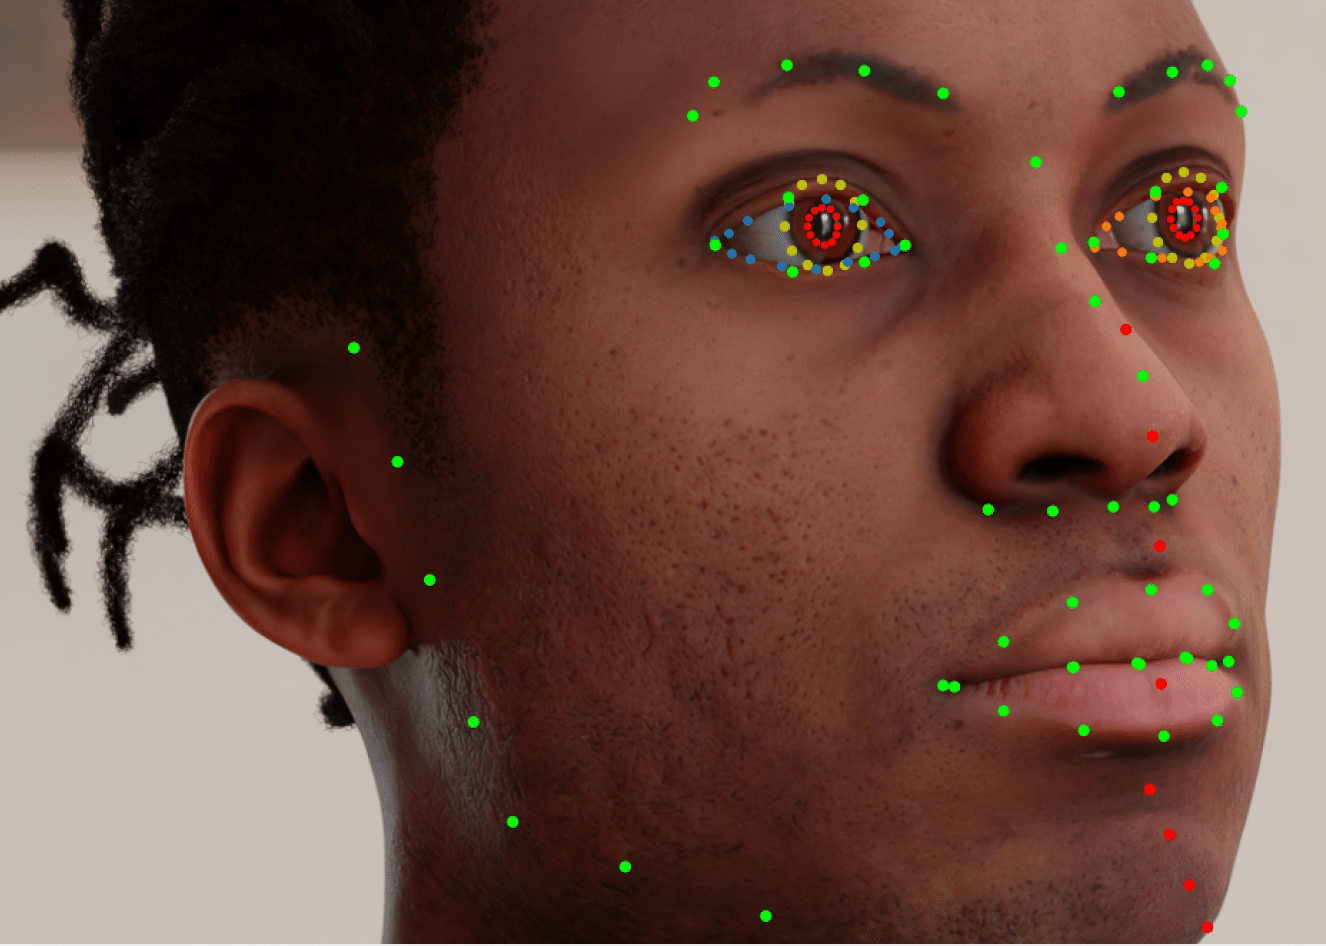
- Recognizing faces and facial expressions
- Extracting text from images and documents
- Analyzing and interpreting the content of images and videos
- Detecting and tracking objects or people in real-time video streams
Getting started with computer vision can be challenging. A great way to get started is to gain practical experience by taking on a small computer vision project. We’ll provide several ideas for projects, with simple datasets and code examples that will let you dive right in.
In this article we provide the following ideas for computer vision projects:
1. Image Classification
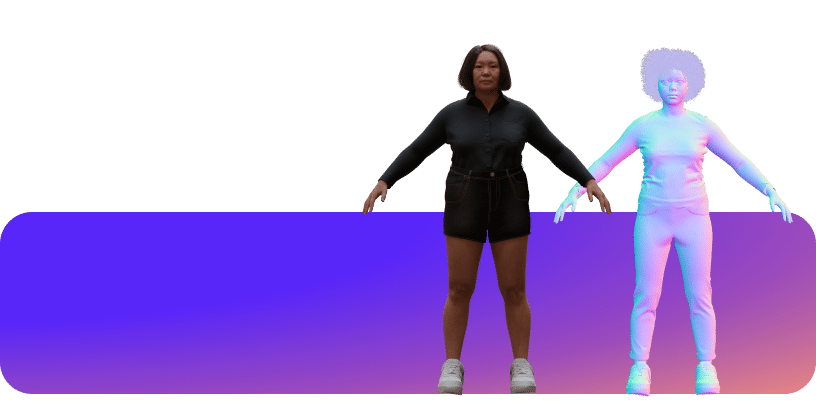
2. Face Detection for Family Photos
3. Object Tracking in Videos
4. Pedestrian Detection
5. Virtual Proctor
6. Neural Style Transfer
Image Classification
Image classification is a fundamental building block of many computer vision applications, such as object recognition, image search, and scene analysis. It involves assigning a label or class to an image based on its content.
Dataset you can use:
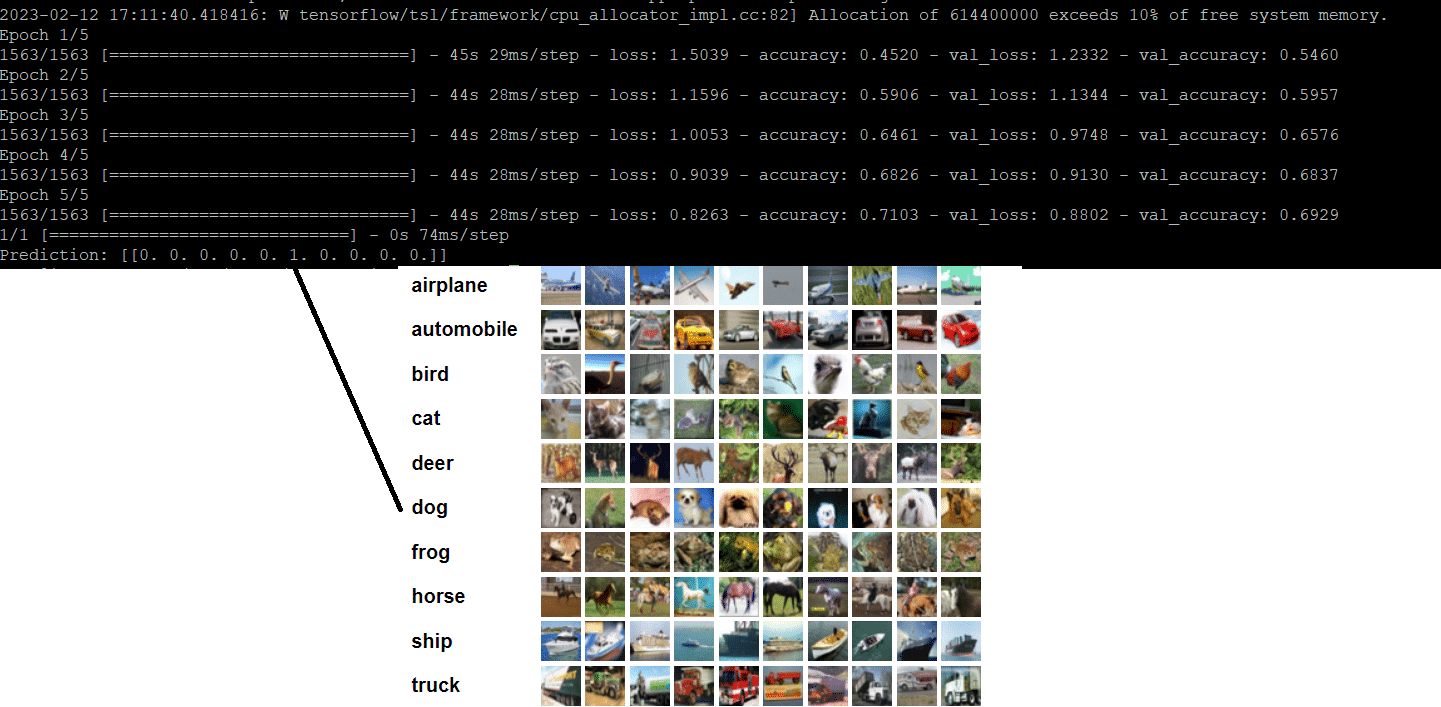
One useful dataset for image classification is CIFAR-10, which consists of 60,000 32×32 pixel color images that are classified into 10 different classes, including airplanes, automobiles, birds, cats, deer, ships, and trucks.
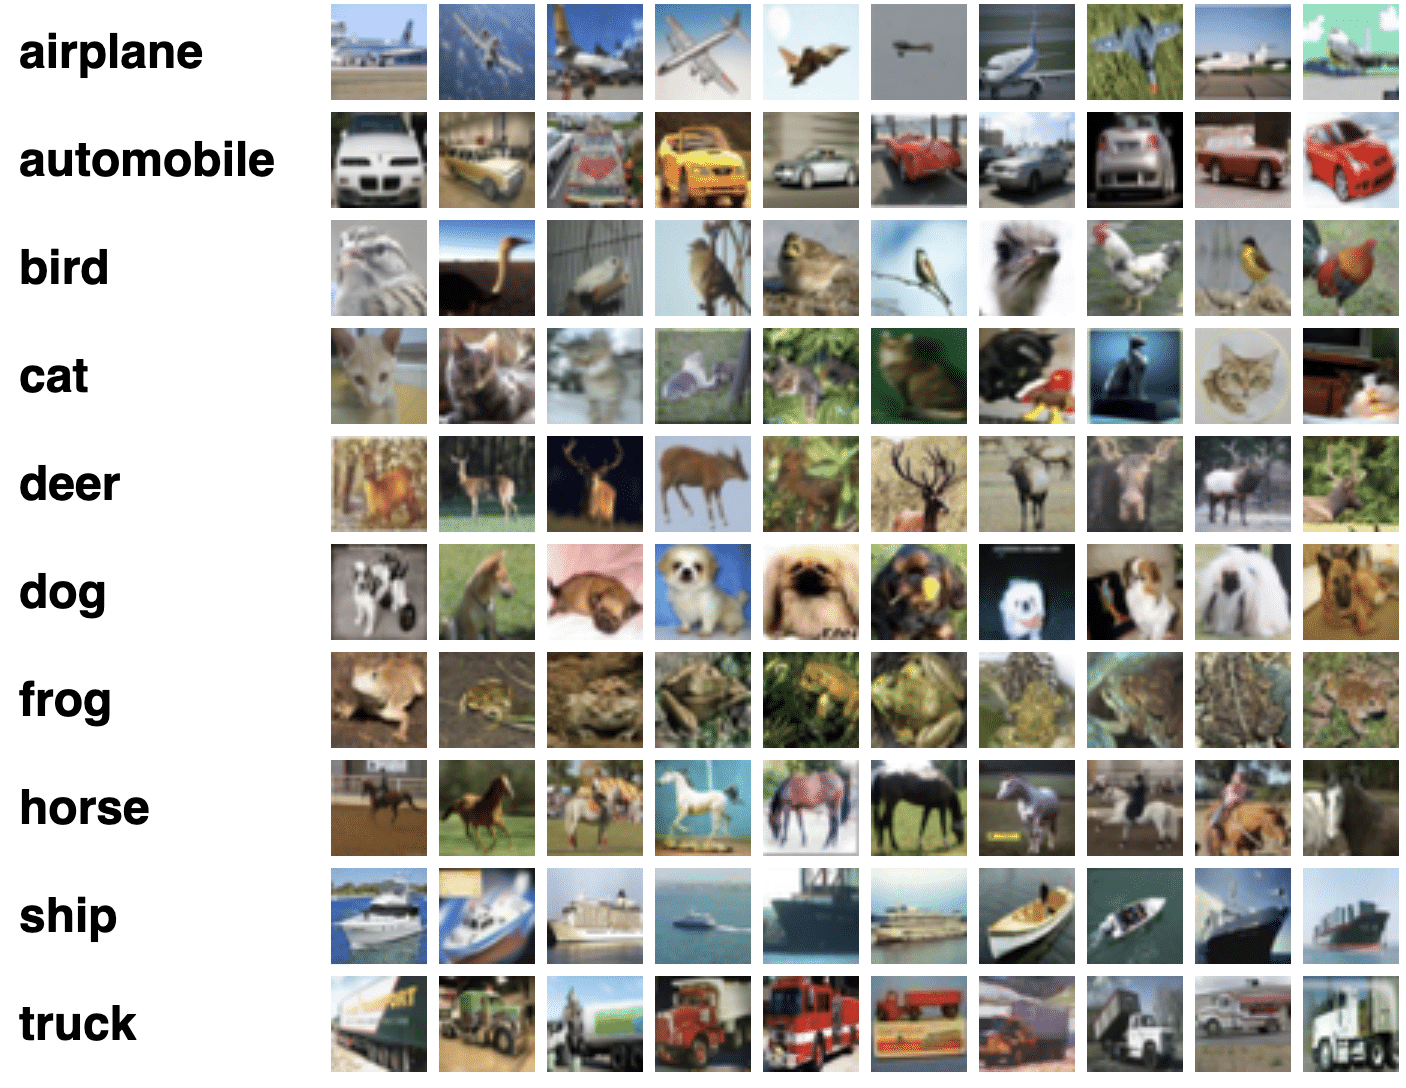
The CIFAR-10 dataset (Source)
Code example:
Here is a short example of how CIFAR-10 could be used for image classification:
- Import relevant libraries:
import tensorflow as tf
import numpy as np
import keras.utils as image
2. Define variables:
from keras.applications.vgg16 import preprocess_input, decode_predictions

(x_train, y_train), (x_test, y_test) = tf.keras.datasets.cifar10.load_data()
x_train = x_train.astype("float32") / 255.0
x_test = x_test.astype("float32") / 255.0
y_train = tf.keras.utils.to_categorical(y_train, 10)
y_test = tf.keras.utils.to_categorical(y_test, 10)
3. Define the classification model:
model = tf.keras.Sequential()
model.add(tf.keras.layers.Conv2D(32, (3, 3), activation="relu", input_shape=(32, 32, 3)))
model.add(tf.keras.layers.MaxPooling2D((2, 2)))
model.add(tf.keras.layers.Conv2D(64, (3, 3), activation="relu"))
model.add(tf.keras.layers.MaxPooling2D((2, 2)))
model.add(tf.keras.layers.Conv2D(64, (3, 3), activation="relu"))
model.add(tf.keras.layers.Flatten())
model.add(tf.keras.layers.Dense(64, activation="relu"))
model.add(tf.keras.layers.Dense(10, activation="softmax"))
4. Compile and fit the model:
model.compile(optimizer="adam", loss="categorical_crossentropy", metrics=["accuracy"])
model.fit(x_train, y_train, epochs=10, validation_data=(x_test, y_test))
5. Generate a prediction. Please download the image dog_test.jpg and save it in your project folder before running the code below.
img_path = 'dog_test.jpg'
img = image.load_img(img_path, target_size=(32, 32))
x = image.img_to_array(img)
x = np.expand_dims(x, axis=0)
x = preprocess_input(x)
preds = model.predict(x)
print('Prediction:', preds)
6. The output should look like this:
Face Detection for Family Photos
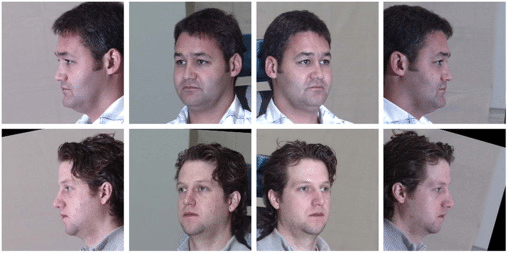
Face detection is a popular computer vision project because it is a practical application with many potential uses. For example, face detection can be used to automatically tag and organize photos in a personal collection by identifying the people in them. It can also be used to enhance the security of a system by detecting and identifying individuals who are attempting to gain access.
Face detection is a relatively accessible project for those new to computer vision, as it is relatively straightforward Performing face detection on family photos is a particularly popular project because it allows individuals to apply the technology to their own personal needs and interests.
Code example:
For example, beginners can start with the user-friendly face-recognition library for Python. It has simple commands for performing face recognition tasks. Below is a code example that detects if Joe Biden is in a picture.
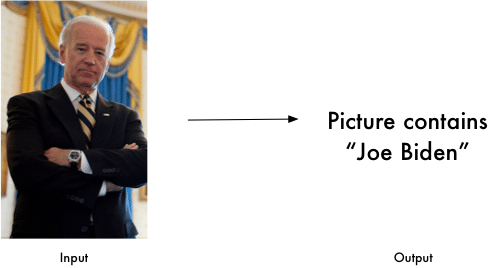
Image Source: Face Recognition Library
import face_recognition
known_image = face_recognition.load_image_file("biden.jpg")
unknown_image = face_recognition.load_image_file("unknown.jpg")

biden_encoding = face_recognition.face_encodings(known_image)[0]
unknown_encoding = face_recognition.face_encodings(unknown_image)[0]

results = face_recognition.compare_faces([biden_encoding], unknown_encoding)
Object Tracking in Videos
Object tracking is a technique used in computer vision to locate and follow an object as it moves within a video stream. It involves continuously analyzing the video frames to detect the presence and location of the object, and then using this information to predict the object’s future location and update its position. Object tracking applications include surveillance, robotics, and sports analysis.
There are four broad categories of approaches to implement object tracking, including feature-based, segmentation-based, estimation-based, and learning-based. For example, Kalman filters and particle filters are examples of estimation-based methods, while neural networks are one of the learning-based approaches.
Dataset you can use:
The TLP dataset can be useful for object tracking projects, with 400+ minutes of HD footage across 50 real-world video clips.
Here is a direct link to downloading the TLP dataset as a ZIP file (note it is 39 GB in size). Unpack the ZIP file to get the tlp_tataset.npz file referenced in the code below.
Code example:
Prerequisites:
Please install the opencv-contrib-python library.
Code example:
- Import the relevant Python libraries:
import cv2
import numpy as np
2. Import the TLP dataset, extract frames and bounding boxes data into their respective variables. The dataset provides a file with information about frames and bounding boxes in CSV format, but OpenCV requires an NPZ format. You can convert the data to .npz using the following commands:
data = np.genfromtxt("groundtruth_rect.txt", delimiter=',')
np.savez('tlp_dataset.npz', data)

data = np.load("tlp_dataset.npz")
frames = data["frames"]
bboxes = data["bboxes"]
3. Information about the frames and bounding boxes can be extracted using the numpy array slicing method:
frames = data[:, [0] ] #Selects the column connect frame info
bboxes = data[:, [1,2,3,4]] #Contains columns for bounding boxes
4. Use OpenCV’s TrackerCSRT_create method to create a tracker and initialize it using the first frame and bounding box:
tracker = cv2.TrackerCSRT_create()

#Load image as a frame
filename =  str(int(frames[0][0])).zfill(5) + ".JPG"
frame = cv2.imread(filename)
bbox = bboxes[0]

#Convert numpy float type to integer
ok = tracker.init(frame, bbox.astype(int))
5. Now loop over all of the frames and update the bounding box using OpenCV’s tracker.update method:
for i in range(1, len(frames)):
    print( "Handling frame: " + str(frames[i][0]))
    frame = cv2.imread( str( int( frames[i][0] ) ).zfill(5) + ".JPG" )

    ok, bbox = tracker.update(frame)
6. If the result of the previous step is true, we update the bounding box rectangle otherwise we will display an error message that tracking had failed.
  if ok:
        p1 = (int(bbox[0]), int(bbox[1]))
        p2 = (int(bbox[0] + bbox[2]), int(bbox[1] + bbox[3]))
        cv2.rectangle(frame, p1, p2, (255, 0, 0), 2, 1)
    else:
        cv2.putText(frame, "Tracking failed", (100, 80), cv2.FONT_HERSHEY_SIMPLEX, 0.75, (0, 0, 255), 2)
7. Save result using numpy’s savez method. This stores information as arrays in uncompressed .npz format
np.savez("tlp_tracked.npz", frames=frames, bboxes=bboxes)The output will looks something like this:

Output saved as a file:

Pedestrian Detection
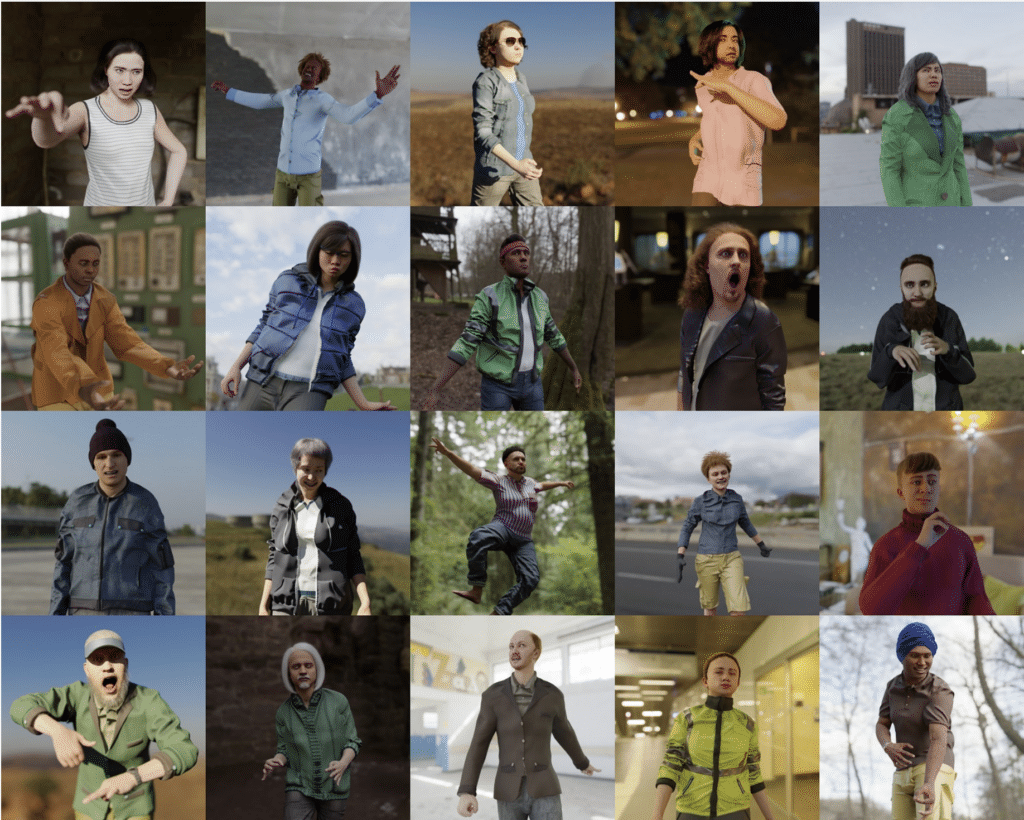
Pedestrian detection is a task to identify and locate pedestrians in images or video. It is often used in applications such as autonomous vehicles and traffic analysis, where it is important to detect the presence and movement of pedestrians in order to avoid collisions or accidents.
Dataset you can use:
The Penn-Fudan Database is often used in research projects related to pedestrian detection and other tasks in computer vision and machine learning. It can be used to train machine learning models to identify and locate pedestrians in images, as well as to evaluate the performance of different pedestrian detection algorithms.
Code example:
Here is a short example of how you might build a pedestrian detector using the Penn-Fudan Database in Python:
- First, we need to import the necessary libraries:
import cv2
import numpy as np
2. Next, we can load the model that we want to use for pedestrian detection. You can obtain the XML file from this link.
model = cv2.CascadeClassifier('haarcascade_upperbody.xml')3. Now we can read an image from the Penn-Fudan Database:
image = cv2.imread('FudanPed00001.png')
4. We can then use the model to detect pedestrians in the image.
5. The detectMultiScale function returns a list of bounding boxes for the detected pedestrians:
boxes = model.detectMultiScale(image, scaleFactor=1.1, minNeighbors=1)6. We can loop through the bounding boxes and draw them on the image:
for (x, y, w, h) in boxes:
    cv2.rectangle(image, (x,y), (x+w, y+h), (0,255,0), 2)
7. Finally, we can display the image with the detected pedestrians:
cv2.imshow('Pedestrian Detection', image)
cv2.waitKey(0)
cv2.destroyAllWindows()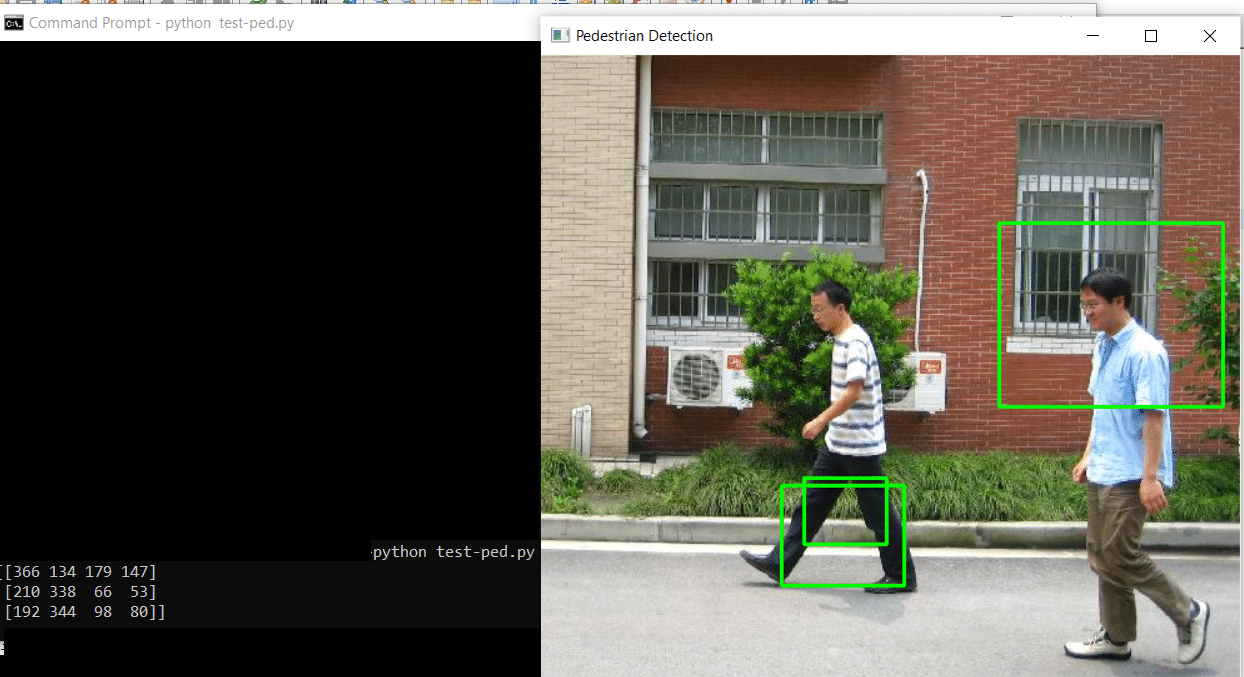
Virtual Proctor
A virtual proctor is a software system that is used to monitor and assess the performance of individuals taking an online exam or assessment. This project is useful for hiring managers processes and educational institutions looking to administer remote exams.
Virtual proctoring systems aim to track the behavior and actions of test-takers during the exam. It looks for any suspicious activity or behavior that could indicate cheating, such as looking away from the screen, talking to someone else, or using unauthorized materials or resources.
These tasks involve object detection models like YOLO, Faster R-CNN, and SSD.
Code example:
Here is a brief example of how the YOLO object detection algorithm could be used in a virtual proctoring system:
- Import the relevant libraries
# import required packages

import cv2
import numpy as np
2. Download required YOLO files
- Please download the yolo.weights from here
- Download the CFG file from here
- Download class names from here
3. Load the YOLO model and list of classes for detection:
model = cv2.dnn.readNetFromDarknet("yolo.cfg", "yolo.weights")

classes = []
class_ids = []
confidences = []
boxes = []

with open("coco.names", 'r') as f:
    classes = [line.strip() for line in f.readlines()]
4. Set up the webcam and get a frame from it. Retrieve frame’s properties (height, width and channels)
webcam = cv2.VideoCapture(0)
_, frame = webcam.read()
width = frame.shape[0]
height = frame.shape[1]
channels = frame.shape[2]
5. Get the list of the layers from the model and instantiate the output layer
layer_name = model.getLayerNames();
output_layer = [layer_name[i-1] for i in model.getUnconnectedOutLayers()]
6. Get a random color for displaying the identified object:
colors = np.random.uniform(0,255, size=(len(classes),3))7. Convert the frame to a blob and pass it through the YOLO model:
blob = cv2.dnn.blobFromImage(frame, 1/255, (416,416), (0,0,0), swapRB=True, crop=False)
model.setInput(blob)
output = model.forward(output_layer)
8. Loop through the detections and draw bounding boxes around any objects that are detected:
for out in output:
	for detection in out:
		scores = detection[5:]
		class_id = np.argmax(scores)
		confidence = scores[class_id]
		#If confidence is over 50% then show the identification box
		if confidence > 0.5:
			center_x = int(detection[0] * width)
			center_y = int(detection[1] * height)
			w = int(detection[2] * width)
			h = int(detection[3] * height)
			# cv.circle(img, (center_x, center_y), 10, (0, 255, 0), 2 )
			# Rectangular Coordinate
			x = int(center_x - w/2)
			y = int(center_y - h/2)
			boxes.append([x, y, w, h])
			confidences.append(float(confidence))
			class_ids.append(class_id)
9. We will use cv2’s NMSBoxes function to ensure only single bounding rectangle is shown for a given object class
indexes = cv2.dnn.NMSBoxes(boxes, confidences, 0.5, 0.4)10. Show the bounding box around the identified object:
font = cv2.FONT_HERSHEY_PLAIN
for i in range(len(boxes)):
	if i in indexes:
		x, y, w, h = boxes[i]
		label = str(classes[class_ids[i]])
		print(label)
		color = colors[i]
		cv2.rectangle(frame, (x, y), (x + w, y + h), color, 2)
		cv2.putText(frame, label, (x, y + 30), font, 3, color, 3)
11. Show the frame and wait for a key press:
cv2.imshow("Frame", frame)
cv2.waitKey(0)
The output will look something like this:
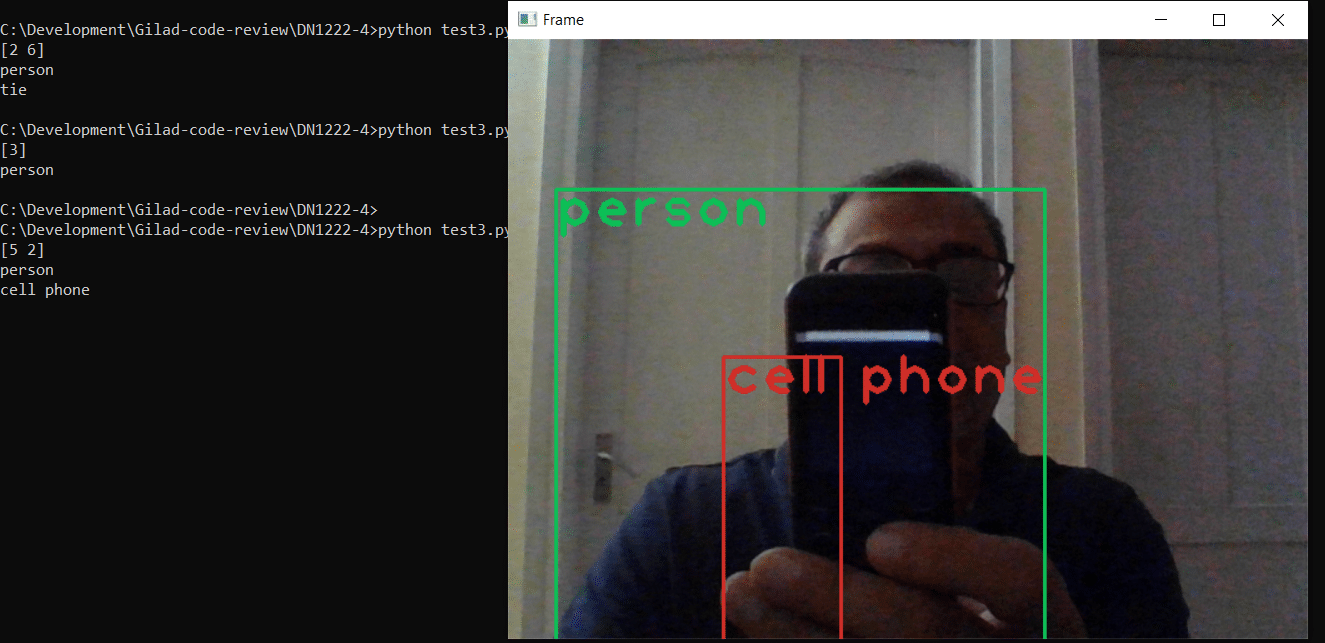
You can then implement additional functionality that inspects what is happening in the frame, such as unusual movement of individuals taking a test.
Neural Style Transfer
Neural style transfer is a technique that allows you to take the style of one image and apply it to the content of another image, creating a new image. This is achieved using a generative adversarial network (GAN).
To perform neural style transfer, you start by providing the neural network with two images: the content image, which is the image that you want to use as the basis for the new image, and the style image, which is the image whose style you want to apply to the content image. The neural network then processes these images and generates a new image that combines the content of the first image with the style of the second.
Datasets you can use:
Neural style transfer is often used to create artistic effects or to transfer the style of one artist or piece of artwork to another image. You can use datasets like ImageNet to build this project.
Code example:
Here is an example of how neural style transfer could be implemented using the ImageNet database:
Step 1: Import the relevant libraries:
import tensorflow as tf
import tensorflow_hub as hub
import sys
import numpy as np
import PIL.Image
Step 2: Select Images for style transfer:
We will use the following set of images for testing the algorithm:
Content image:

Style Image:

Step 3: Load the images
We create a method for converting JPG images into TensorFlowImage, providing the image path. This will ensure that images fed to the model are normalized – this means they have 3 channels and are properly scaled.
def convert_to_tf_image(path_to_img):
  max_dim = 512
  img = tf.io.read_file(path_to_img)
  img = tf.image.decode_image(img, channels=3)
  img = tf.image.convert_image_dtype(img, tf.float32)

  shape = tf.cast(tf.shape(img)[:-1], tf.float32)
  long_dim = max(shape)
  scale = max_dim / long_dim

  new_shape = tf.cast(shape * scale, tf.int32)

  img = tf.image.resize(img, new_shape)
  img = img[tf.newaxis, :]
  return img
We call this function as follows:
content_path =  './content.jpg'
style_path = './style.jpg'

content_image = convert_to_tf_image(content_path)
style_image = convert_to_tf_image(style_path)
Step 4: Use TensorFlow’s pre-built model for image stylization
Tensorflow_hub provides free access to pre-build models for Image stylization. We will use a model called “arbitrary-image-stylization-v1-256” to apply a style to the content image.
We load the model as follows:
hub_model = hub.load('https://tfhub.dev/google/magenta/arbitrary-image-stylization-v1-256/2')Now using the model, we create a stylized image with a simple method that takes two arguments: content_image and style_image and produces the stylized image:
stylized_image = hub_model(tf.constant(content_image), tf.constant(style_image))[0]Please note that stylized_image above is a tensor and it can’t be directly stored as an image file.
Step 5: Convert tensor to JPG image
We will write a simple helper function that converts the resulting tensor to a format that can be stored as a JPG image.
def tf_to_image(tensor):
  tensor = tensor*255
  tensor = np.array(tensor, dtype=np.uint8)
  if np.ndim(tensor)>3:
    assert tensor.shape[0] == 1
    tensor = tensor[0]
  return PIL.Image.fromarray(tensor)
We can call this method as follows:
final_image = tf_to_image(stylized_image)Now we can store the final image as a JPG using the following command:
print("Converted and now saving the final-output.jpg")
final_image.save("final-output.jpg")
Here is the output image, final-output.jpg:
Read More
The State of Facial Recognition Today
Procedural Humans for Computer Vision